If you’re involved in crypto today, you can’t escape NFTs.
While everyone has strong opinions on non-fungible tokens, there’s no denying their impact on the crypto industry.
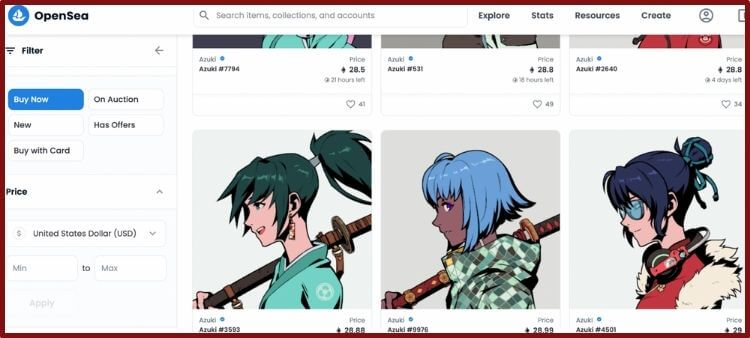
VeVe is one of the many platforms vying for the top spot in the super-competitive NFT collectibles market.
Owned by the Singapore-based company ECOMI, VeVe is an iOS and Android app with many enviable NFT partnerships.

OMI is the central utility token used in the ECOMI ecosystem, so it has attracted a lot of attention from NFT fans.
Many people who aren’t into trading NFTs are scooping up OMI tokens to get exposure to the booming NFT market.
However, even if you’re knowledgeable about crypto, it can be pretty challenging to buy OMI.
If you’re interested in buying OMI as an investment or using the VeVe app, then you should keep reading.
In this post, I will explain a safe & straightforward strategy to add OMI to your portfolio.
Why Would Someone Buy OMI Tokens?
As I hinted in the intro, people usually buy OMI tokens because they’re bullish on the NFT market.
Some people use OMI to snag NFT collectibles on VeVe, while others simply “hodl” OMI because they believe the VeVe app will grow in popularity.
Why are so many NFT fans optimistic about VeVe?
Partnerships!

Since the VeVe app launched in 2018, it has sold millions of NFTs with some of the biggest brands in entertainment.
I’m talking about names as big as Disney, Marvel, and DC.
And that’s far from an exhaustive list.
Another reason people like the VeVe app is because it lets users show off NFTs in swanky virtual galleries.

You could even use augmented reality to make the most of your digital collectibles.
So, are there any downsides to the VeVe app?
Of course!
As with any other cryptocurrency, you need to consider risks before buying OMI tokens.
For starters, there’s fierce competition in the NFT market.
Although VeVe has a unique platform and huge partnerships, it’s still relatively small compared with markets like OpenSea.
Also, as you’ll soon discover, OMI isn’t the most accessible token.
This may change as ECOMI gets larger, but a lack of accessibility hinders VeVe’s future growth.
There’s also the risk that the digital collectibles market will fizzle out in the ensuing years.
If you’re new to ECOMI and VeVe, I’d encourage you to read the company’s official white paper and test the app for yourself.
See how the VeVe app feels and experiment with transferring a small amount of OMI.
After you have more knowledge and first-hand experience with VeVe, you should know whether OMI is a good investment.
What’s The Best Way To Buy OMI Tokens — The Best Options For Beginners
OMI isn’t the easiest cryptocurrency to buy, but there are a few tried-and-true ways to get it.
If you pay careful attention to these tips, you’ll secure some OMI tokens in no time.
Set Up An OMI-Compatible Crypto Wallet
Before buying OMI, I’d recommend setting up a compatible crypto wallet.
Sure, you could leave your OMI on an exchange, but that’s not the safest option.
Plus, if you plan to use OMI on VeVe at some point, you’ll need to transfer it out anyway.
Arguably, the safest way to store OMI is on the ECOMI Secure Wallet.

This razor-thin hardware device can keep your keys offline and link with the mobile ECOMI wallet app.
Since ECOMI designed this wallet, they made it easy to deposit OMI tokens.
On the downside, the ECOMI Secure Wallet isn’t free.
If you’d prefer storing your OMI in a free (but non-hack-proof) software wallet, then I’d recommend using either Trust Wallet or MetaMask.
FYI: I’ve covered both of these highly-regarded hot wallets at length in this previous Trust Wallet vs. MetaMask comparison guide.
Of these two, Trust Wallet is the more convenient choice.
You could simply search for “OMI” in Trust Wallet and receive tokens in your account.
That’s not the case with MetaMask.
Not to get too technical, but ECOMI uses the GoChain blockchain.
So, if you want to store your OMI on MetaMask, you need to go into “Settings” and enter this GoChain info:

FYI: People who use the GoChain have to pay gas fees with another crypto called “GoChain” (go figure, right?)
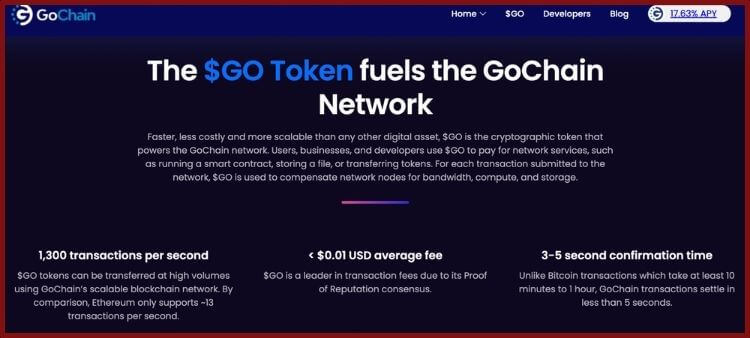
Thankfully, you can easily find GoChain on many big exchanges like Binance, KuCoin, and Gate.io.
Also, the gas fees on GoChain are far less expensive than on Ethereum.
Find An Exchange That Sells OMI
At this time, you can’t “shop around” for the best exchange to buy OMI tokens.
There are only two reputable sites where you could add OMI to your portfolio.
OK, you could use a decentralized exchange like Uniswap, but that’s probably too advanced for newcomers.
Also, you’re going to have to pay high gas fees on Ethereum to make your trade — so, Uniswap is the least cost-effective option.
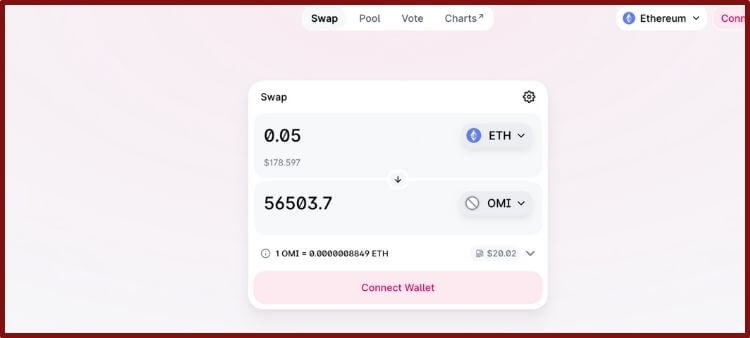
However, if you’d like to use Uniswap, please refer to my previous guide on “How to Buy Floki Inu.”
For these reasons, I’d recommend signing up for either Gate.io or BitForex.
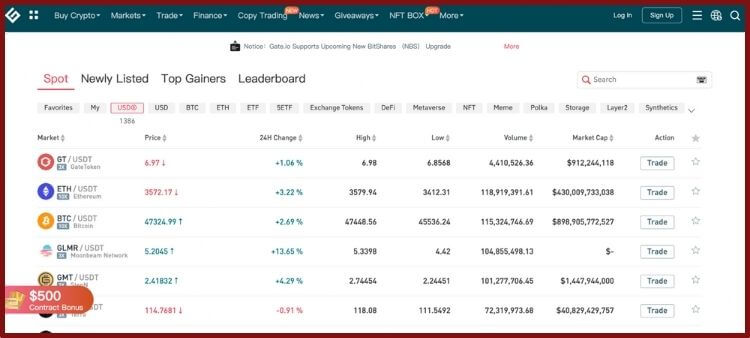
These exchanges have a good reputation in the crypto community for security, fees, and ease of use.
Take a look at both exchanges and see which one you feel more comfortable with.
Also, take a look at the official trading pairs offered with OMI.
Since OMI is a relatively small altcoin, you’ll probably have to use the stablecoin USDT (aka Tether) or Ethereum to make a trade.
Sign Up For A Crypto Exchange That Has OMI
After you’ve decided whether you want to use Gate.io or BitForex, it’s time to create an account.
Signing up isn’t super complicated. You just have to type your email address, create a password, and submit any requested KYC info.

You should also enable 2FA with your account for an extra layer of security.
To do this, download an app like Authy, Microsoft Authenticator, or Google Authenticator and find the “Security” tab in your crypto exchange.

There should be a portal where you could sync your 2FA app with your exchange via a QR code.
Once you have 2FA enabled, you’ll have to enter the random numbers on your app to get into your account.
If you need more detailed info on signing up for Gate.io, you’ve got to check out my post “How To Buy CHAIN.”
Transfer A Supported Crypto For OMI To Your Exchange
Now that you’re on Gate.io or BitForex, you need to get crypto into your new account.
Remember: You can’t just buy OMI with any old crypto.
OMI usually only has two trading pairs:
- OMI/USDT
- OMI/ETH
Therefore, you need to get either USDT or Ethereum into your account’s wallet.
The easiest way to do this is to buy one of these tokens on another exchange and send it to your Gate.io or BitForex account.

For instance, I bet many of my US readers already have either a Coinbase or Gemini account.
You could easily buy Ethereum on these American exchanges and send it to your Gate.io or BitForex accounts.
Please copy the address from your new exchange’s associated Ethereum address.
However, if you’d like to buy USDT or Ethereum directly on your exchange, you could use your credit card…but you’re going to have to pay extra fees.

You could also link your bank account to get cash into your Gate.io account.
Buy OMI Tokens
Finally, it’s time to buy some sweet OMI tokens!
Since you should have ETH or USDT in your account, it’s pretty straightforward to get OMI.
First, search for OMI in your exchange’s spot trading browser.
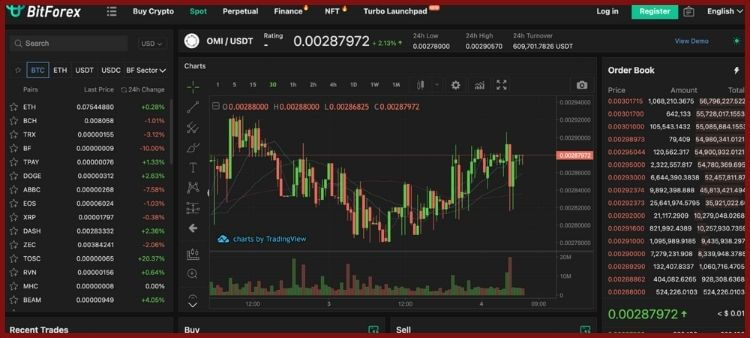
Choose the trading pair that works for you.
Enter the amount of OMI you want to buy for ETH or USDT.

Review the associated fees, and submit your market or limit order.
Once your transaction is confirmed, you’ll see OMI tokens appear in your exchange account’s wallet.
Transfer OMI Off Of The Exchange
Transferring crypto off of your exchange is optional, but it’s the best way to keep these tokens secure.
Please read this previous post for my breakdown of the cons of leaving coins on an exchange.
The best crypto wallets that accept OMI include the ECOMI Secure Wallet and Trust Wallet.
To send your OMI, you first need to copy the public address for OMI on whatever wallet you want to send OMI to.
Next, click on your OMI tokens in your Gate.io or BitForex exchange, select “Send,” and enter how much you want to transfer. Paste the address from the external wallet’s OMI page, and confirm the transaction.
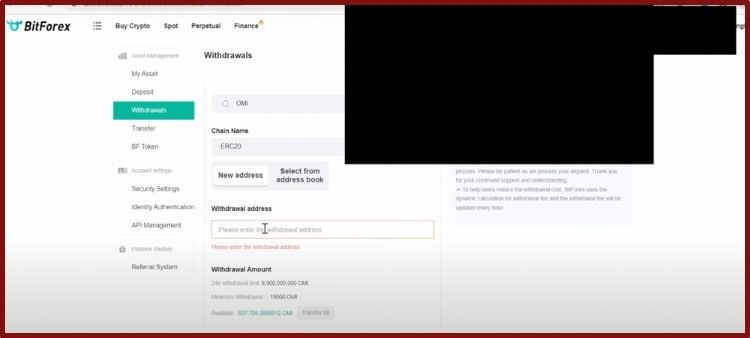
It should take a few minutes to see OMI pop up in your external wallet.
By the way, you’ll follow the same steps above to send OMI to your VeVe app, except you’ll use the OMI address linked with your VeVe account.
Pro Tip: Please Start Small When Sending OMI!
Even the official ECOMI team stresses the importance of first transferring OMI tokens in small batches.
Even if you feel like you’re a crypto pro, it’s easy to make a mistake when buying and sending OMI.
Since OMI is a relatively small project on a lesser-known chain, it’s not the easiest token to transfer.

I’d hate for anyone to lose all their OMI tokens for making a simple mistake.
I know, you will pay extra fees to transfer smaller amounts of OMI.
However, if something goes wrong with your first OMI transfer, at least you didn’t lose all of your funds!
Also, once you see your first successful OMI transfer, you’ll feel more confident buying and using these tokens.
Want to learn how I make money using crypto? Check out my favorite node project here.